
How to Auto Label Emails in Gmail: Ultimate Guide 2026
Learn how to auto label emails in Gmail for an organized inbox. Discover filters, advanced rules, and tips to keep your emails clean and efficient in 2026.
You open Gmail to reply to one client, and fifteen minutes later you’re still triaging newsletters, receipts, calendar noise, and notifications that should never have been sitting in your primary inbox in the first place. The problem usually isn’t email volume alone. It’s that every message arrives looking equally urgent until you impose structure.
Gmail already gives you that structure. Its native Filters and Blocked Addresses system can automatically apply labels based on sender, subject keywords, and other searchable criteria, so messages organize themselves as they arrive. Once you understand how to auto label emails in Gmail, the inbox stops behaving like a pile and starts behaving like a workflow.
Why Auto-Labeling Will Change Your Inbox
Auto-labeling matters because manual sorting is a tax on focus. Every time you decide whether a message belongs under Clients, Finance, Hiring, or Read Later, you’re spending attention on filing instead of acting. The best inbox systems remove that decision from the moment of arrival.
Gmail’s labeling system works well because it’s native. You’re not bolting on another dashboard or granting a third party access just to keep messages organized. You create rules once, and Gmail applies them automatically in the background.
What changes when labels happen automatically
A labeled inbox is easier to scan, easier to search, and easier to trust. You stop wondering whether an invoice is buried in Promotions or whether a recruiter thread disappeared under a batch of product updates.
A 2023 study by the Email Management Institute found that users who implement auto-label filters reduce manual inbox sorting time by an average of 40%, saving approximately 3.2 hours per week in organizational tasks, as cited by Zapier’s Gmail labels guide.
Practical rule: If you find yourself applying the same label by hand more than a few times a week, that task should become a filter.
Why this beats a folder mindset
Labels are more flexible than folders because one email can carry multiple meanings. A single thread can be both Client and Urgent. That matters when you’re managing work that overlaps across people, projects, and deadlines.
Auto-labeling also supports cleaner inbox habits. Once messages land in the right place automatically, it becomes much easier to archive what you don’t need in front of you. If you’re trying to build that habit too, this guide on how to archive messages in Gmail pairs well with a label-first setup.
The payoff is simple. Your inbox stops being a place where everything lands, and becomes a place where the right things surface.
Creating Your First Auto-Labeling Rule in Gmail
Start with a rule you can judge in seconds. A newsletter, a recurring receipt sender, or one client domain is ideal because you already know what should match and what should not.
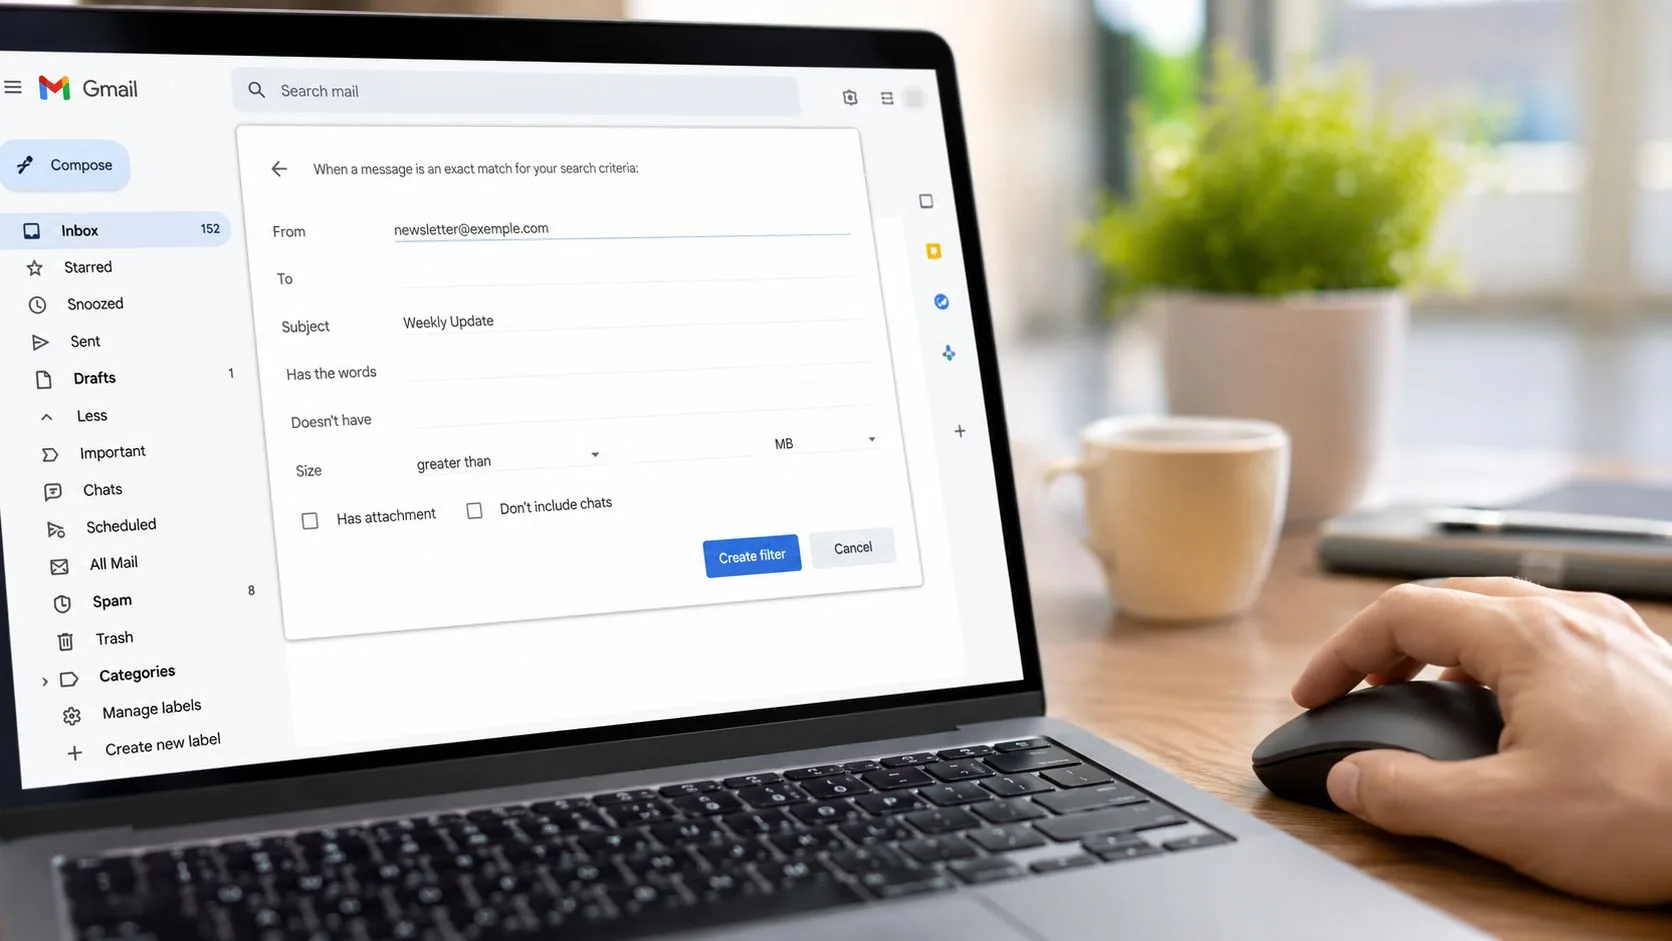
The fastest way to build a first filter
Open Gmail in a desktop browser and click the filter icon inside the search bar. Gmail opens its advanced search form, which is the control panel for every auto-labeling rule you will build later.
For a first pass, use one signal only. Put a sender address in the From field, or use a reliable subject phrase if messages come from different addresses but share the same topic. Then click Create filter.
Early filter mistakes are typically scope mistakes. If you start with three conditions at once, it gets harder to tell why the rule missed messages or caught the wrong ones.
Choose a helpful action
On the next screen, check Apply the label and either select an existing label or create a new one.
Name the label for how you will find the email later. Newsletters, Receipts, and Client/Acme age well. Vague labels usually become junk drawers within a month.
If you want a clean first setup, use this sequence:
- Choose one clear condition. One sender, one domain, or one repeatable keyword pattern is enough.
- Apply one label first. Extra actions like archiving or marking as read can wait until you trust the match logic.
- Review a few known examples. Before saving, make sure you can point to existing emails that should be captured.
- Apply the rule to older messages. If Gmail shows matching conversations, select the option to label those too.
That last step is useful because it gives you instant proof. If older messages land where you expected, the rule is probably tight enough. If unrelated threads get swept in, narrow the criteria before you build on it.
Google documents this workflow in its Gmail filter settings help page, including the option to apply a new filter to matching conversations that are already in your mailbox.
A simple example that holds up
Say a weekly newsletter keeps pushing important mail down your inbox. Use a rule like this:
- From:
newsletter@example.com - Action: Apply label
Newsletters - Later, if needed: Skip the Inbox
I usually stop there on day one. Skipping the inbox is useful, but only after you confirm the sender is consistent and the filter is not catching anything you need to see right away.
The same logic applies to outbound workflows. If you send recurring follow-ups or status updates, cleaner message formats make future filtering easier, especially if you also use automated email response workflows in Gmail. Consistent subjects and phrasing also pair well with a solid marketer’s guide to email templates, since predictable structure makes both manual search and filter design easier.
What to avoid on day one
Do not build a full labeling system in one sitting. Filters look simple, but the trade-off is maintenance. Every extra rule adds another place where messages can be mislabeled, skipped, or buried.
Start with one irritation you see every week. Get that rule working. Then add the next one with the same discipline. That approach gives you a filter system you can trust, which matters much more than having a long list of clever rules.
Essential Filter Recipes for a Tidy Inbox
A tidy inbox usually comes from a small set of filters that solve the same problems every week. The goal is not to label everything. The goal is to separate high-value conversations from low-urgency mail so important threads stay visible and routine messages still stay easy to find.
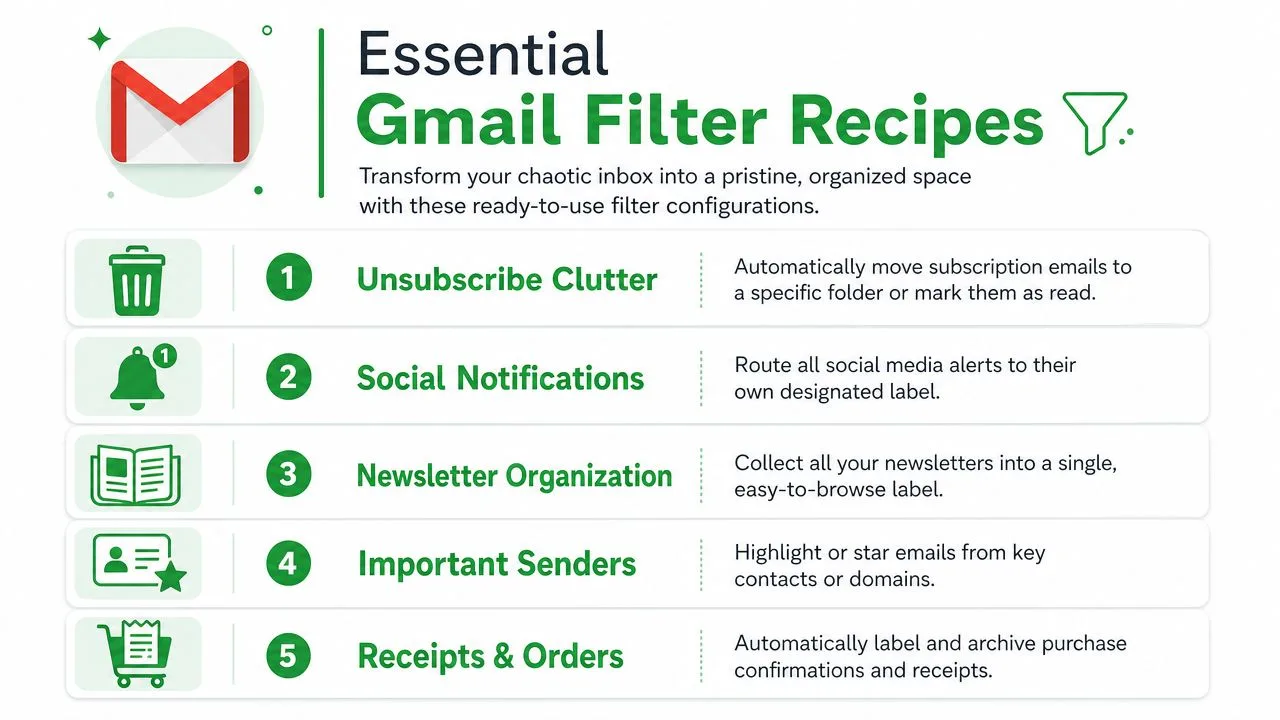
Five recipes that solve common inbox messes
These are the filters I recommend first because they keep paying off with very little maintenance.
-
Client domain filter
If one company generates constant back-and-forth, use a domain-wide rule such asfrom:(*@clientcompany.com) OR to:(*@clientcompany.com). Apply a label likeClients/ClientCompany. This keeps incoming notes, replies, and sent messages connected under one label, which makes it much faster to pull up the full relationship history before a call or handoff. -
Receipts and order confirmations
Search for subject terms likesubject:(invoice OR receipt OR "order number"). Apply aReceiptslabel. Skip the inbox only if those messages are rarely time-sensitive. For freelancers, operators, and anyone who has to reconcile expenses later, this rule saves real cleanup work at month-end. -
Attachment finder
Use Gmail’s attachment criterion to label messages that include files. A label likeAttachmentshelps when contracts, decks, signed PDFs, or screenshots tend to disappear inside long threads. I like this filter because it organizes by what the message contains, not just who sent it. -
Newsletters in one place
Group recurring reads underNewslettersinstead of letting them compete with active conversations. This works best when you review that label on purpose once or twice a week. Otherwise, the label becomes a parking lot you never open. -
System notifications
For tools that generate alerts, create labels by function instead of by product. A deployment notice from one service and a monitoring alert from another can both live underOps Alerts. That structure holds up better as your tool stack changes.
A good filter recipe creates a queue you will actually review, not just a cleaner-looking inbox.
Organize labels by action, not by sender
Labels work better when they reflect what you plan to do with the message. Needs Reply, Receipts, Clients, and To Read are usually more useful than a long list of app names and vendor logos.
That approach also makes advanced automation easier later. If a label already represents a clear workflow, it is much simpler to pair it with automated email response workflows in Gmail or a review routine on your calendar.
There is a trade-off. Broad labels are easier to maintain, but they can hide useful detail if you combine unrelated mail. Narrow labels give you precision, but they create clutter fast. In practice, one parent label with a few sublabels usually beats dozens of flat labels.
Quick reference table
| Inbox problem | Filter idea | Label |
|---|---|---|
| Messages from one company | from:(*@company.com) OR to:(*@company.com) | Clients/Company |
| Purchase confirmations | subject:(invoice OR receipt OR "order number") | Receipts |
| File-heavy threads | Has attachment | Attachments |
| Recurring publications | Sender-based filter | Newsletters |
If you only build three filters this week, start with the ones that protect client history, collect financial records, and remove low-priority reading from your main inbox.
Advanced Auto-Labeling Techniques for Power Users
Basic filters handle obvious patterns. Power-user filters handle messy reality, where one rule needs to catch multiple senders, multiple keywords, and a specific type of email without sweeping up junk.
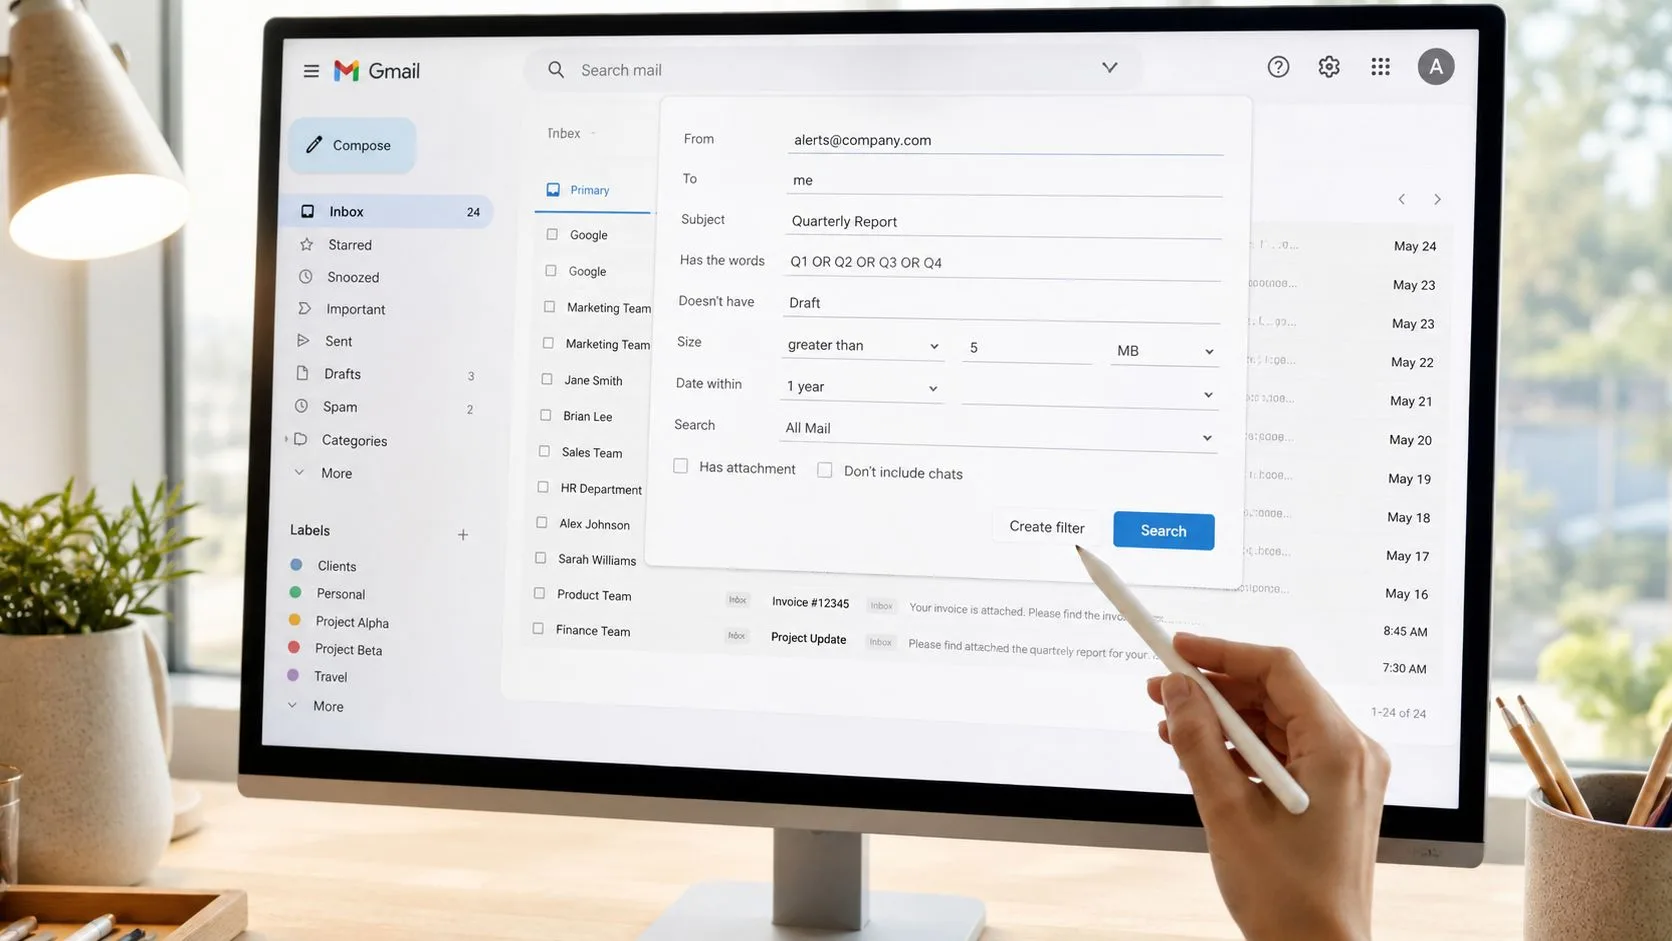
Use compound logic instead of filter sprawl
The fastest way to improve Gmail organization is to stop creating one tiny rule per sender when several belong together. Gmail search operators let you combine conditions with OR, group terms in parentheses, and narrow results with fields like from: and subject:.
Experts recommend building compound filters such as from:(@github.com OR @gitlab.com) subject:("build" OR "deploy"), which cuts manual sorting time by approximately 65% when applied to bulk notifications and marketing newsletters, according to CDGI’s Gmail labeling tip.
That matters because one well-written filter is easier to maintain than six overlapping ones.
Try patterns like these:
- Multiple senders, one category:
from:(alerts@toolone.com OR notices@tooltwo.com) - Sender plus topic:
from:(*@client.com) subject:(invoice OR renewal) - Exclusion logic: Add a minus sign to omit noise, such as messages that match a general sender but contain a phrase you don’t care about
Build a label hierarchy you can live with
Nested labels turn Gmail into a lightweight filing system. Instead of making dozens of top-level labels, create parent labels such as Clients, Finance, or Hiring, then place sublabels underneath them.
A simple structure might look like this:
- Clients
Clients/AcmeClients/Northwind
- Finance
Finance/InvoicesFinance/Receipts
- Ops
Ops/DeploymentsOps/Vendors
This keeps the sidebar readable while still giving you precise categories.
The best hierarchy mirrors how you search later, not how you brainstorm today.
Combine actions for real workflow gains
You’re not limited to applying a label. Gmail filters can also star a message, archive it, mark it as read, or forward it. The trick is using multiple actions only when they serve a specific behavior.
For example:
- Label invoices under
Finance/Invoices - Star only invoices from your highest-priority vendors
- Skip the inbox for low-priority automated alerts
- Forward certain messages to a shared address if another teammate owns them
Used carefully, this turns Gmail from storage into triage.
A quick walkthrough can help if you want to see the interface in motion:
One advanced move worth stealing
For organization-level correspondence, use a bidirectional rule like from:(*@domain.com) OR to:(*@domain.com). That catches both sides of the conversation. It’s one of the most useful filters in Gmail because it keeps sent and received messages under the same label instead of splitting the history across Sent and Inbox.
That’s where advanced labeling starts to pay off. You’re no longer tagging isolated emails. You’re organizing relationships.
Auto-Labeling Tracked Emails with Mail Tracker for Gmail
Gmail doesn’t provide a native, scalable way to track email opens. Systematic open tracking depends on third-party tools, and Gmail’s built-in read receipt option is limited to individual emails on eligible paid Google Workspace accounts where an admin has enabled it, as explained in this overview of Gmail open tracking.
For people who already use the add-on Mail Tracker for Gmail™, there’s a useful organizational trick. The Google Workspace Marketplace listing confirms that Mail Tracker for Gmail™ is a native add-on available on mobile and web, allowing users to open the add-on to track emails and view open counts in the Marketplace listing.
How to create a tracked mail label
If your tracked outgoing emails include a consistent signature or identifiable marker, you can build a Gmail filter around that text. The goal is simple: automatically label tracked outbound correspondence so it’s easy to review later.
Use this approach:
- Search sent mail for the unique signature text that appears on tracked messages.
- Click the filter icon in Gmail search.
- Build a filter from that query.
- Apply a label such as
Tracked. - If Gmail shows matching conversations, apply it retroactively.
This gives you a live bucket of sent messages tied to tracking activity, which is useful when you want to review outreach separately from the rest of Sent Mail.
If you want more background on how tracking works inside Gmail, this guide to email tracking for Gmail is a helpful companion.
Troubleshooting and Maintaining Your Filter System
A filter system usually breaks in a familiar way. Labels start drifting, one newsletter lands in a client folder, and a rule you trusted last month now catches far more than it should. The problem is rarely Gmail itself. It is filter sprawl.
The main culprit is overlap. A broad rule such as has:attachment or from:@company.com can catch messages meant for a narrower client, billing, or tracked-email label. As your setup grows from a few filters into a real workflow, small conflicts like that become harder to spot unless you review them on purpose.
How to diagnose a broken filter
Start with search, not editing. Gmail search shows you what the rule matches. If the search results are wrong, the filter logic is wrong too.
Check these points first:
- Look for overlapping rules: Broad conditions often grab mail that should fall into a more specific label.
- Read the query field by field: One extra term can make a filter too narrow. One missing operator can make it far too broad.
- Test against older mail: Run the exact search manually in Gmail. If the expected messages do not appear, the filter will not catch new ones either.
- Check for outdated assumptions: Addresses change, senders switch domains, and automated emails often arrive from a different alias than the one you used when you built the rule.
One practical habit helps here. Keep your high-value labels tied to signals that stay stable over time, such as a sender domain, list address, or repeated phrase in the subject line, instead of temporary wording from a single campaign.
Maintenance habits that keep the system usable
Review filters on a schedule. Monthly is enough for a personal inbox. For a sales, recruiting, or support workflow, every two weeks is safer because message patterns change faster.
During that review, do three things:
- Delete filters tied to finished projects or old vendors.
- Merge labels that describe the same type of mail.
- Retest any rule connected to tracked correspondence, invoices, or priority contacts.
This is what keeps the system strong over time, especially if you built advanced rules or a separate label for Mail Tracker for Gmail activity. The more specialized the filter, the more important it is to confirm that the marker you chose still appears in new messages.
Also check deliverability when expected emails never arrive. Sometimes the filter is fine, but the message never reached the inbox because the sender has reputation problems. If that is part of the issue, this guide explains how to fix public email blacklist issues.
Good auto-labeling is not a set-it-and-forget-it feature. It is a working system. Trim it, test it, and keep the label structure aligned with how you process email now, not how you worked six months ago.
If you want visibility into whether important outbound emails were opened, Mail Tracker for Gmail adds read receipts, open counts, and in-Gmail tracking signals on web and mobile, so you can follow up with better timing instead of guessing.
Ready to track your emails?
Add Mail Track for Gmail from the Google Workspace Marketplace and know the moment your emails are opened. Free and unlimited.
Add to GmailMore reading
More from Tutorials
How to Find My Contacts in Gmail: A Practical Guide
Learn how to find my contacts in Gmail on desktop and mobile. Clear steps for Google Contacts, search tips, shortcuts, and contact details from emails.
Objection in Sales Explained and How to Handle It
Learn what objection in sales really means, why it happens, and proven frameworks to handle price, timing and trust objections with confidence.
How to Forward Emails in Gmail
Learn how to forward emails in Gmail with step-by-step instructions for single messages, automated filters, mobile setups, and troubleshooting silent failures.